


****UPDATE- The 2013 version of the menu planner is up and ready for you to download (for free)! So, after you read this post head on over to this one to download the fresh and free version!****
My dearest apologies to all of you for not having this post up as quickly as I thought I would! Our back-to-homeschool week (and weekend leading up to it) have been a little crazier than I had hoped and there just haven’t been enough hours in the day. Plus I am getting used to a new little piece of technology (which I will probably be sharing about in the near future) so that is thrown a curve ball into the whole matter as well- not a bad one, but a curve ball none the less.

I digress- back to the topic at hand- putting together that crazy, year-long meal plan binder! By now I am hoping that you have been able to accumulate all your materials, but just for a little refresher, here is what you will need:
- A two inch binder
- My printables for a year of meal planning (see this post)
- Lots of sheet protectors
- Packing tape
- Decorative paper to jazz up your binder a bit
So here’s the low down on how to put it all together-
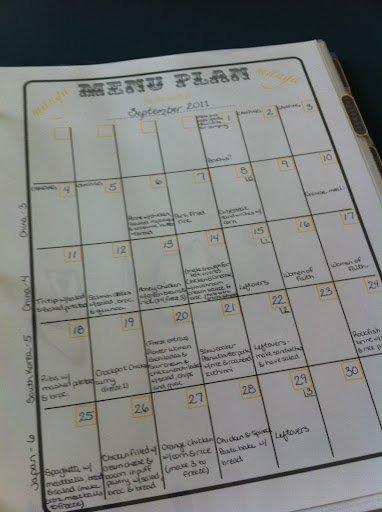
First you will need to place all 12 of your calendars in sheet protectors (whether they are filled out of not). This is the main reason that I like to use regular sheet protectors (and not the fit-to-page size where you actually have to whole punch the pages) because I know I will have to be taking these calendars in and out to change things if need be and so forth so just easier to be able to slide them in and out.
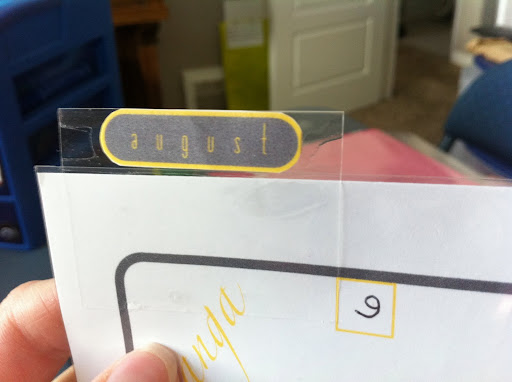
Second, I take my packing tape and create tabs (using the ones provided in my printable) directly on these sheet protectors. I just placed the label in the middle of a piece of the tape, stuck the front side to the sheet protector, folded it over, and voila’! Don’t they look snazzy?!

Third, I place two sheets worth of weekly shopping lists behind each calendar (four lists total).
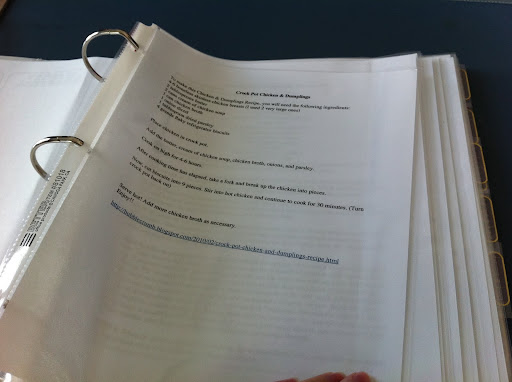
Fourth, and this is the part that can take a little bit of work but it’s worth it, I place a copy of every recipe I will be using that month (unless it is in an actual cookbook that I own) in sheet protectors to avoid cooking splatters and in the order I will be using them behind the shopping lists. It is so helpful to not have to be hunting down recipes and it is much easier this way to have them all on hand so that you can easily fill out your shopping lists and maximize your purchased ingredients.
Now you may be thinking, “Does this mean I am supposed to put the recipes for every month in there right now?” The answer is, “Yes!” And yes, that does mean that you will be making multiple copies of recipes, but in the long run it is such a timesaver and you will be able to reuse these multiple copies for years to come (so don’t come crying to me about trees and ink!). Do remember, however, that you will hopefully be incorporating long-term freezer meals into the mix, so you will only need to put the recipe in the binder for the month that you will be making extra to freeze, and you of course won’t need to put in any recipes for nights you are having leftovers or plan to be going out. So, see, it really isn’t that bad!

Now, I am going to put in a little alternative here in case you happen to be one of those lucky souls who has gone mostly techy and been blessed with an iPad. There is a wonderful app called The Recipe Box that allows you to easily cut and paste your own recipes into it along with including pictures, notes, sources and the easy ability to print or email in a really nice format. It lacks the advantage of having all your recipes easily in order but they are quick to find and look so professional and beautiful. Although I haven’t yet found any wonderful meal planning calendars, you could always just use iCal or Google calendars, or whatever calendar it is that you use.
I must admit that as much as I love technology and have been oogling over The Recipe Box app there is still just something special about having a well organized and attractive meal plan binder sitting in my kitchen. Call it my obsession with paper, but I will just always be drawn to those concrete homemaking journals that can truly become a legacy to pass down to your children. It’s up to you- heck, go wild and do both!
So there you have it! It’s that simple! A chunk of work now that will save you headaches and money all year long (and really, for years to come)! And if you happened to miss my post the other day about how you do the actual planning part of this task, then be sure to pop over to that post to get the full skinny!
I would LOVE to see your binders when they’re done and I am always open to questions and suggestions, so don’t be shy! Thank for stopping by and have fun planning! 😉
