Archive for ‘the BOLD kitchen’

December 27, 2012

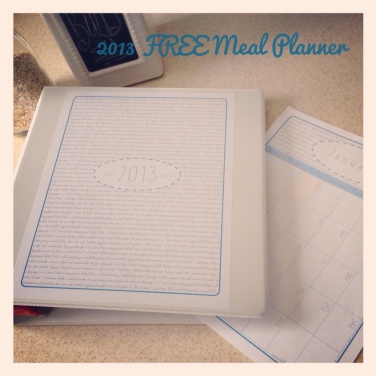
FREE 2013 Bold Meal Planner

The much anticipated FREE 2013 Bold Meal Planner is here at last!

This year’s version includes:

  • Binder cover & Spine
  • Binder Divider Tabs
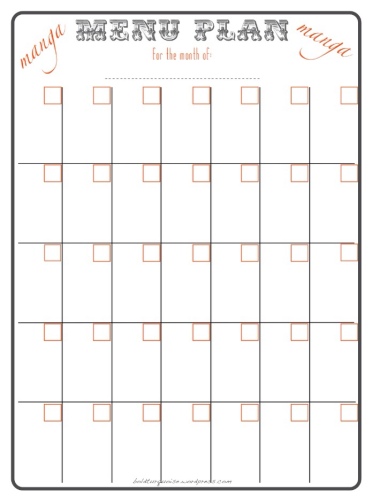
  • Dated Calendars for 2013 with highlighted holidays
  • Full-page shopping list for when you are making those BIG trips to the store!

You can download these printables at the bottom of this post. (As a thank you, it would be awfully swell of you to subscribe to my blog! I’d hate for you to miss anything in the future! 🙂 )

You can find my post on Putting Together Your Meal Plan Binder here.

You can find my original post on doing your actual meal planning here.

I had hoped to have my entire meal planning ebook with the accompanying full set of printables finished by now, but in order to get them into the fully polished condition I would like them to be in before releasing, I just need more time. I plan to have these completed early in the new year and I can assure you that both will be chocked-full of goodness that you will love, including more broken-down, easy to follow instructions and meal suggestions!

**Please note, it has come to my attention that I’ve seriously overlooked a flaw in this planner- 2 Octobers, no November! Haha- oops! Mind you I was probably only interrupted approximately 8,000 times while creating these! 😄 Since I created these printables on my Grandmother’s computer in town (I only have an iPad) I will need to fix them when I am next able to get into town. So sorry for the inconvenience and please feel free to print all other months until I am able to correct the issue! Thank you for your understanding and patience!**

December 30, 2011

It’s Finally Here- the 2012 Meal Planner!!

**Update** The brand new, 2013 Meal Planner is now up and available for download on this post.  Enjoy!

I finally did it! I got the 2012 year-long menu planner revised and uploaded to a more friendly platform (aka- it’s NOT going to ask you to pay!!). I know many of you have been very patiently waiting and I am glad I could bring it to you at last!
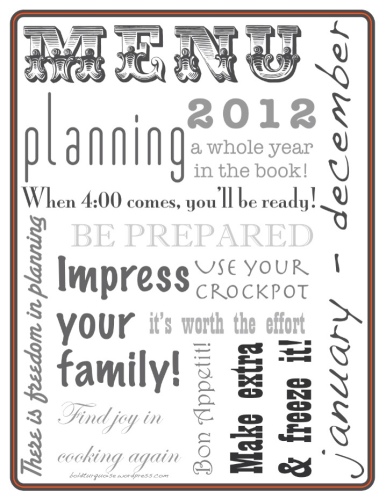
It is pretty much the same as the original, only updated to only be for 2012 (January- December) and, of course, I had to jazz it up a bit with the new color of the year (tangerine tango)! Want a little peek?

Oh, ok!

Plus I have six more fun and useful pages just waiting for you to snag them (for free!)! You can access this PDF right HERE via Google Docs or you can simply click on either of the pics above!

You can still access all the directions for putting together your meal planning binder on this post

And detailed directions for how to actually accomplish all that planning here on this post.

The only thing I ask, if you choose to download my planner, is that you leave a comment to let me know what you think! I just love to hear from you guys! Oh, and if you wanted to subscribe to my blog too, it wouldn’t hurt my feelings. 😉

Happy New Year Meal Planning!

September 2, 2011

Freezer Breakfasts- the ins and outs (with printable plan)

Alright, I know there have been many of you wanting to get your hands on this little printable and I am so sorry I wasn’t able to post it sooner! I was working on getting some permissions for reposting and now have everything good and clear so we’re ready to roll!

Basically, I came up with this plan when I was considering our school year, our routine, the boys need for good protein in the morning and my intense dislike of anything before about 10:00 am. While I am working very hard to get up at the wretched hour of 6:00 (and possibly earlier as I get more used to it) I knew that I wanted to be able to devote as much of that quiet alone time as possible to the Lord, blogging and possibly even exercise (Gasp! Can you believe I actually uttered that last word?! Christa, don’t laugh!).

So anyhoo, the whole idea of freezer dinners popped into my head and it dawned on me, “Hey! Why not do that for breakfast instead?!” So I created a plan and that is exactly what I did! The plan I am posting today is for 4 weeks of September (so starting on Monday). I hope to be posting the October plan soon also so that you guys can get an earlier jump on it. This first plan includes the following recipes:
Coconut pancakes (from Health, Home, Happy)
Banana Carrot Muffins
Dutch Babies
Quiche (or fritatta) w/ leftovers for Friday

You can download the full printable right here– please excuse the last two black pages, my computer was freaking out a bit.

The printable includes a full set of instructions along with shopping list and tips, but here are a few more little tidbits for you to consider-

-To keep bags standing upright, place them in a large bowl or box.

-If you are planning on making these breakfasts alone and not in a group (which can be very handy but plan on a full day of work!) then I recommend that you make one or two breakfasts over the span of a week or two leading up to when you will actually need them. It makes the whole process less daunting and more doable.

-Batters are most easily made in one large sum and split evenly between all the bags but it is best to use a large kitchen mixer such as the BOSCH Universal Plus Mixer. (I used this technique with both the muffins and the pancakes but I really probably could have done it with all 4 recipes)

-I found with the pancakes that a combination of all three sweeteners (honey, coconut milk and applesauce) was our favorite AND letting the batter sit overnight before cooking helped combat the dryer texture that these scrumptious pancakes can lean towards.

-Don’t misplace a bag and split all your ingredients between three bags instead of four and then have to scoop some out of every bag to make that fourth bag that you obviously will need if you don’t want to have to be dealing with breakfast on some random Thursday morning four weeks from now! Not that that happened or anything.

-If you have a smaller family, like myself, I found that cutting down some of the recipes was plenty sufficient for us. I only made a 2x batch of coconut pancake batter instead of a 4x batch and I only made 3 batches of muffins since they make 18 per recipe (this was one that I just split evenly between the bags and it worked brilliantly).

-And one last little tip- to pour batters out of their bags (especially handy when filling muffin tins) snip one corner off the freezer bag and squeeze it out like a pastry bag. Seriously- you will want to kiss me!

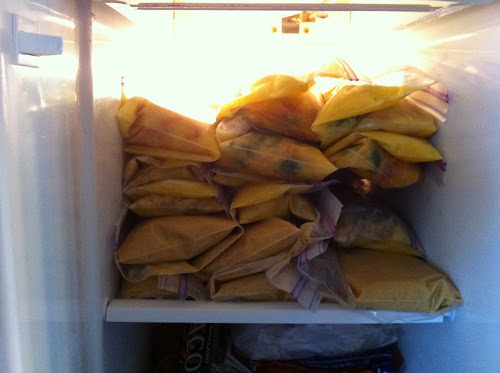
And that’s it! Let me tell you, it feels sooooo good to have all those breakfasts neatly lined up on the top shelf of my freezer, knowing that I won’t have to resort to any last-minute stressed-out bowls of cereal and my boys will be getting a good dose of protein before each and every school day- even on the days we have to head off early to co-op!

Yes, yes, I do believe this is the smartest thing I have done in quite sometime, if I do say so myself! So go on, go make yourself feel as smart as I do! 😉

Oh, and just a little plug, the coconut pancake recipe is from this site, which offers a ton of other awesome grain-free recipes and meal plans (Cara was kind enough to allow me to repost her recipe and get me signed up with this affiliate link)!

Sign Up for Grain Free Meal Plans

August 24, 2011

Putting together your Meal Plan Binder for the year

****UPDATE-  The 2013 version of the menu planner is up and ready for you to download (for free)!  So, after you read this post head on over to this one to download the fresh and free version!****

My dearest apologies to all of you for not having this post up as quickly as I thought I would! Our back-to-homeschool week (and weekend leading up to it) have been a little crazier than I had hoped and there just haven’t been enough hours in the day. Plus I am getting used to a new little piece of technology (which I will probably be sharing about in the near future) so that is thrown a curve ball into the whole matter as well- not a bad one, but a curve ball none the less.

I digress- back to the topic at hand- putting together that crazy, year-long meal plan binder! By now I am hoping that you have been able to accumulate all your materials, but just for a little refresher, here is what you will need:

  • A two inch binder
  • My printables for a year of meal planning (see this post)
  • Lots of sheet protectors
  • Packing tape
  • Decorative paper to jazz up your binder a bit

So here’s the low down on how to put it all together-

First you will need to place all 12 of your calendars in sheet protectors (whether they are filled out of not). This is the main reason that I like to use regular sheet protectors (and not the fit-to-page size where you actually have to whole punch the pages) because I know I will have to be taking these calendars in and out to change things if need be and so forth so just easier to be able to slide them in and out.

Second, I take my packing tape and create tabs (using the ones provided in my printable) directly on these sheet protectors. I just placed the label in the middle of a piece of the tape, stuck the front side to the sheet protector, folded it over, and voila’! Don’t they look snazzy?!

Third, I place two sheets worth of weekly shopping lists behind each calendar (four lists total).

Fourth, and this is the part that can take a little bit of work but it’s worth it, I place a copy of every recipe I will be using that month (unless it is in an actual cookbook that I own) in sheet protectors to avoid cooking splatters and in the order I will be using them behind the shopping lists. It is so helpful to not have to be hunting down recipes and it is much easier this way to have them all on hand so that you can easily fill out your shopping lists and maximize your purchased ingredients.

Now you may be thinking, “Does this mean I am supposed to put the recipes for every month in there right now?” The answer is, “Yes!” And yes, that does mean that you will be making multiple copies of recipes, but in the long run it is such a timesaver and you will be able to reuse these multiple copies for years to come (so don’t come crying to me about trees and ink!). Do remember, however, that you will hopefully be incorporating long-term freezer meals into the mix, so you will only need to put the recipe in the binder for the month that you will be making extra to freeze, and you of course won’t need to put in any recipes for nights you are having leftovers or plan to be going out. So, see, it really isn’t that bad!

Now, I am going to put in a little alternative here in case you happen to be one of those lucky souls who has gone mostly techy and been blessed with an iPad. There is a wonderful app called The Recipe Box that allows you to easily cut and paste your own recipes into it along with including pictures, notes, sources and the easy ability to print or email in a really nice format. It lacks the advantage of having all your recipes easily in order but they are quick to find and look so professional and beautiful. Although I haven’t yet found any wonderful meal planning calendars, you could always just use iCal or Google calendars, or whatever calendar it is that you use.

I must admit that as much as I love technology and have been oogling over The Recipe Box app there is still just something special about having a well organized and attractive meal plan binder sitting in my kitchen. Call it my obsession with paper, but I will just always be drawn to those concrete homemaking journals that can truly become a legacy to pass down to your children. It’s up to you- heck, go wild and do both!

So there you have it! It’s that simple! A chunk of work now that will save you headaches and money all year long (and really, for years to come)! And if you happened to miss my post the other day about how you do the actual planning part of this task, then be sure to pop over to that post to get the full skinny!

I would LOVE to see your binders when they’re done and I am always open to questions and suggestions, so don’t be shy! Thank for stopping by and have fun planning! 😉

August 19, 2011

Meal Planning a Year at a Time- Yes it can be done!

***UPDATE- The 2013 version of the year-long meal planner is now available!  Check out this post for the snazzy, pepped up and very FREE printable- after you read this one of course! 😉 ***

Well, here it is- one of the big doosie posts I’ve heard so many of you are looking forward to (I can only hope it lives up to the hype)! Today I am going to tell you how to plan your meals out for a year- yes, I said a year. By the time we are done here today you will know how to map out a working outline for your year that will only need a few tweaks along the way and incorporate some manageable freezer cooking and, I promise, will greatly simplify your life! Be sure to stop back by tomorrow though, when I show how to organize all of your recipes and the whole master plan into an attractive show-piece for your kitchen! (Ok, so it’s just a jazzed up binder! BUT I love mine and am proud to have it out in my kitchen!)
First, before we really get planning though, let’s talk about why you would even want to tackle this project- ya know, for you skeptics out there! So, just to get you motivated (and possibly convinced), here are my

Top 5 Reasons to Plan Your Meals Out For a Year:

  1. Save Time– in more than one way!! Never face the 4:00 witching hour again! Having a plan set in place months in advance gives you peace of mind and one less thing to think about. Plus, as you make certain meals in triplicate to freeze for future months and are able to get big prepwork jobs done (since you know what needs to be prepped so far out) you save yourself oodles of wasted time by doing those tedious jobs all at once!
  2. Save Money! Having a long-term plan allows you to buy nonperishable items in bulk, saving you a huge chunk of change! You never thought you needed that 5lb can of olives from the wholesale warehouse before, but now that you’ve planned out your meals and discover that in the next couple of months you have 6 recipes containing olives and 2 of them you are planning to make in larger quantities so that you can freeze some, you realize that that 5lb can is a bargain compared to the multiple small cans you would buy over that same time period! And that isn’t even mentioning all the cash you will save by not having to run to the store for those last-minute forgotten items, since, ya know, you’ve had everything planned out and detailed shopping lists written! Oh, and have I mentioned the last-minute eating out savings you will also incur? See, the benefits just keep spilling out!
  3. Diversify your meals! I don’t know about you, but when I did monthly freezer cooking my husband hated the monotony of the meals, week after week! When I plan out a year at a time I am able to make sure I am spreading things out and not cooking the same thing all the time. I find this so much easier to do when I am looking at the big picture!
  4. Reuse plans! Just think, next year at this time, your work will be done! How stinking awesome is that!?! Aside from the minor tweaks and additions of new meals you will want to make every year, you have got your basic working plan in place after your first year and never have to go back to square one of meal planning again! Since you have planned a year, each month will be seasonally based and customized to your unique family! Booya!
  5. Feel like a homemaking queen! This just might be my favorite perk! I mean seriously, you feel pretty ridiculously good about your organizational and homemaking skills when you accomplish this feat that sounds so daunting to the average Joe-Blow who hasn’t yet been enlightened with the simple steps I’m about to reveal to you! 😀 I should hand out badges or something!!

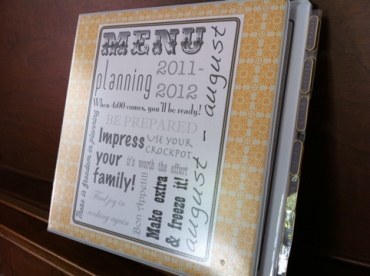
So, have I reeled you in yet? Are you ready to give it a go? You’d be crazy not to, right?! Ok, buckle up! Let’s get started!First of all, we are going to be making one of these puppies…
20110819-105509.jpg

…but actually not until tomorrow!  However, you will need the planning forms.  And since I love you more than my luggage, I have uploaded the entire set to Google Docs for you, (see this post for the link)). So, go run over there and print them out really quick! Pages 1 & 2 you will need only 1 copy of, but you will need 12 copies of page 3 (the calendar) and 26 copies of page 4 (the shopping lists). Pages 5 & 6 (the recipe cards/pages) are for you to use however you like ( I am hoping to figure out how to make them editable so that you can type in your recipes- or cut and paste- but that might take a bit before it happens).
All printed and ready to roll? Awesome! Here are the other things you will need to complete your menu binder (but remember, we won’t be putting it all together until tomorrow)-

    • Sheet protectors (a LOT of them!)
    • Packing tape (or a 12-pack of dividers, but ONLY if you are using page-sized sheet protectors!)
    • Decorative paper (just to pretty up the covers, as you can see on mine)

 
Ok, now set your binder aside until my next post and just get out your calendars. This is where the diligence begins- ya know, the part when you are actually going to plan out all the meals! Don’t freak out! Let me simplify it for you.
First– think about the needs of your family on a weekly basis. What does your schedule look like during the week? Is there a certain day of the week that an easy soup or crockpot meal would typically come in really handy? Is there an even crazier night that it would be super helpful to just be eating leftovers? Are you one of those families that likes Mexican on Monday, Italian on Tuesday, Chinese on Wednesday, and so forth? Use this knowledge to formulate your basic weekly routine.
Let me give you an example of the basic routine we are going to be following this year. I know that as we travel the world with our homeschool curriculum this year, Monday nights are probably gong to be the best for eating ethnically from the particular country we are studying. So every other Monday I have planned a dish from those countries. I have filled in the other Mondays either with a second dish from that country, or a tried and true recipe that we love. Tuesdays I am primarily reserving for new dishes that I have found (or will find along the way- remember, this plan is flexible and is meant to fit your life. I’ll be going into this more in a minute). Wednesdays we have an activity in the later evening, so I have planned to make a crockpot meal or soup AND I will be making a large enough quantity so that we can have leftovers on Thursday, since that is our craziest day and night of the week (Co-op all day followed by hip-hop and eventually basketball! Sheesh!). Many Fridays my boys will likely be hangin’ with the grandparents, so I have tried to plan a meal that is more parent than kid friendly and is a smaller dish. With that said, I try to keep a few alternatives easily on hand in case they are home that evening and I need to switch things up. Saturdays and Sundays I also try to plan easy foods (that often have leftovers)- like homemade pizza or a roast for pulled meat sandwiches.
Alright, you still with me? Have you mapped out the typical weekly needs of your family? Great! Moving on!

Next we are going to take into consideration all those little hiccups that occur throughout the year- and by that I mean the things that break you out of your mapped out routine, such as holidays, birthdays, dinner with friends, etc… The holidays are pretty easy to manage- just don’t plan those days! I figure that we will be with our extended family those days and even if I am helping prepare the meal it is a joint effort and not something that I need to plan for. Around each birthday I typically leave one night open with no plan, figuring that we will be getting together with family or going out. I also leave one or two weekend nights open each month for the possibility of getting together with friends or family. It doesn’t really matter which weekend nights I leave open though, since they can easily be switched around (its more about the number of meals planned than the exact night they were planned for in this case). When it comes right down to it, of course other things always arise throughout the year that will cause you to have to break away from the plan which is fine- the point is that you have the plan in place as a back up. The plan doesn’t master you- you master the plan!

Now that you have taken all your scheduling needs into consideration, it is time to get down to the nitty-gritty! Start filling in that big blank canvas! Don’t feel like you have to follow the order of the days. I find it is easier if I go through and plan all my Wednesdays, making sure I don’t repeat things too often and so on. I’ll then thumb through my recipes for the ones my family really loves and go through the next few months plugging them in once a month or so, so that the kids are satisfied but The Carpenter isn’t burnt out! I plan hardier dishes through the winter months and allow for more salads and lighter fare in the spring and summer. I try to incorporate seasonal sidedishes and even throw in a big fancy dessert here and there just to bless my family’s socks off!
So what if you discover a dish mid-year that you want to add but have no room in your schedule? Do you just wait for next year? Well, of course not! That would be silly! As I mentioned above, I actually plan that my Tuesdays will be new dish night, most of the time. So I just leave start leaving my Tuesdays open on my plan (a few months out), figuring that I will be filling them in with new dishes I find along the way. My one stipulation is that I always have a full schedule for 2-3 months so that I don’t end up getting caught one night with nothing on the agenda. And if I run across a recipe that I really want to try sooner, well I just switch it out! I planned it, it’s my prerogative to switch it if I want!
Also, on that note, what do you do with the new dishes that you try and like and want to start working into your schedule before next year? Well, I leave one or two days open every month (once again, a few months out) to start working those new and well-loved recipes into our regular mix. Always remember to make the plan work for you- just don’t get behind in filling in the little stuff throughout the year or you’ll be kicking yourself and defeating the whole purpose of all this preplanning! 🙂
Now, what if you are looking at all those empty dates and thinking, “There is no way I have enough recipes to fill all this in without repeating every other week!” or you just aren’t sure where to get new recipes to fill in your “new recipe day” with? Well, let me give you a few of my favorite go-to sources:

    • Pinterest!!! There is just nothing like the visual plethora of meal options on the beloved Pinterest! Seriously- this is my first destination when looking for new material!
    • The Pioneer Woman– oh the deliciousness that spills out of that woman’s blog! And hey, her show on Food Network starts on August 27- so you can check her out there too!
    • A Year of Slow Cooking– a different slowcooker recipe for every day of the year!
    • Mel’s Kitchen Cafe– This lady has some awesome stuff! Love, love, love! Some of our favorite recipes are straight from her archives!
    • Granola Mom 4 God– My dear friend has some rockin’ whole food recipes! Just this week she posted on how she makes countertop yogurt (no cooking!)- I must try! We love the Almond Flour Chicken Bites she posted a while back- in fact we just had it last night!

 
Just keep working at it. To be totally honest this process is time consuming, so you may even want to set aside some time for a number of days, just to not get overwhelmed! I think you will be surprised to find, though, just how much of a roll you get on as you begin filling in those little blank spaces!

Alright- go get to work!  I’ll see you tomorrow and we’ll bang out that cute binder I showed you!!

August 9, 2011

Branching out- my OWN bread recipe!

Well, I have been fooling around with this whole homemade bread baking thing for about a year now and I have to say that for most of the year I really did make all of our bread. It has been fun trying different recipes and seeing what my family likes. In recent months however, I have been getting a little out of comfort zone and actually trying to come up with my own recipes. They are mostly combinations of other recipes that we have enjoyed, and luckily, we have been very happy with the results!

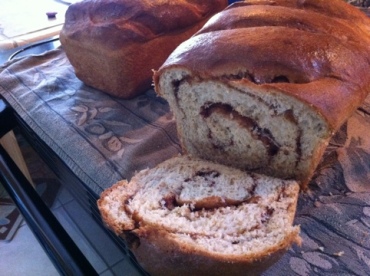
20110808-032241.jpgI am sure you can imagine the pleasure I gleaned from the look of shock on The Carpenter’s face when upon asking me which recipe I had used I told him my own!

Today I whipped our latest favorite and I even made a cinnamon roll loaf- which is already half gone!

What’s that? You want my recipe? Well, I suppose… 🙂

BOLD Bread

This recipe makes approximately 5 loaves and is intended to for heavy-duty home mixers, such as the BOSCH Universal Plus Mixer.

Add all these ingredients in the order listed:

3 Cups Warm Water (between 110-120 degrees)

2 Cups Warmed Milk

3 Eggs

1/2 Cup Melted Butter (I told you it was going to be good!)

2/3 cup Olive Oil

2/3 Cup Honey

1 1/2 TBSP Sea Salt

3 Cups Whole Wheat flour (preferably home-milled- I used Golden Wheat Montana Farms)

4 TBSP SAF Yeast

At this point you should turn the mixer on and begin adding another 5-7 cups of your whole wheat flour.  Now we are going to switch over to some white flour  to finish it off (I know, I know, I feel all you whole foodies cringing!) but make sure you get a high-quality white flour that isn’t bleached.  You could stick with your whole wheat at this point but you would need to add about 3 TBSP of dough enhancer and should expect an over-all more dense loaf that won’t rise as well after having been frozen.

Now, all of you you who aren’t very proficient in bread making are probably in a little tizzy thinking, “Well, how in the blazes am I supposed to know how much more flour to add!?  Why doesn’t she just make this easy and give me a number!?”  Well, if I did that you wouldn’t be learning anything, now would you? (Ya know- gotta teach a man to fish!).  Plus, the amounts really do vary with humidity and such, so I’m not just trying to be difficult!  So just settle your little self down for a second and listen to just how easy this is- Add flour one cup at a time (a good rule of thumb is to add the next cup as soon as the last one if fully incorporated).  Once your dough is clumping around your hook and not sticking to the edges of the bowl, you’re done!  That’s it!  See, that wasn’t so hard, now was it?!  And always remember that you are better off not having enough flour than having too much.

Once you have all you flour incorporated let your mixer knead on a medium speed for about 6 minutes.  After that, turn off your mixer and let your dough rise for about 35-35 minutes.

When your dough is sufficiently popping out the top of your machine you can ready a large cutting board or other surface as well as your hands, by slathering them generously with olive oil.  Next dump your dough onto the board and divide into 5 loaves.  For the loaves that you want to bake immediately, simply throw them into greased pans, score the tops about a half an inch deep in whatever patter you like and let them rise for another 35-45 minutes.  Bake at 350 for about 30 minutes and then slather with butter to give you a nice soft crust.

For the loaves that you don’t want to bake immediately, just wrap the dough (that you haven’t let rise for a second time) in freezer paper and chuck those babies in the ice box!  And note that they take a fairly good amount of time to thaw and rise, so you will probably want to take one out again, like… tomorrow!  This bread disappears fast!

Most importantly- enjoy & come back to tell me what you think!

I must say that I never would have come to this point if it weren’t for the tremendous confidence I acquired as a direct result of repeatedly using The Bread Basket Cookbook from Marmee’s Bread Market along with everything I learned from her DVD- Make it Special. She offers great products and knowledge, including Bosch Mixers and a wide variety of quality grain mills. You should check her out!

May 19, 2011

Gnocchi with Mushroom Sauce, how I love thee!

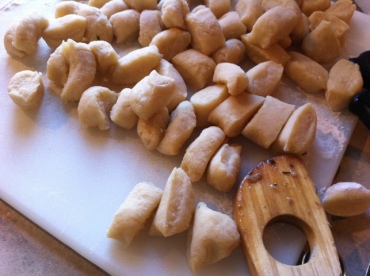
Well here’s another one that comes courtesy of The Pioneer Woman… sorta. Well, she posted a picture of it a few weeks ago and I’ve had it up in a browser tab ever since, just waiting for the perfect time to make it. I don’t know why yesterday was “perfect” for it, but I was in the mood for a culinary adventure so I gave it a go!

It also might have helped that The Carpenter had had the Food Network on in the background of most of our day. Just sayin, wathin’ good cookin’ gets you in the mood to cook!

20110518-100709.jpg

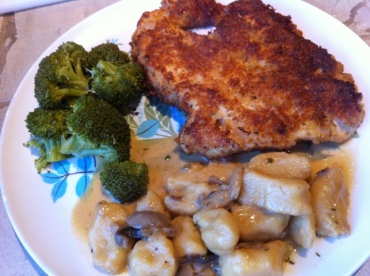
I paired the gnocchi with this recipe from Ina May Garten for Parmesan Chicken (or an improvised version of it based on the episode I saw yesterday anyway). Oh, and we had some horribly overcooked broccoli, but hey, you can’t expect the whole meal to be perfect… that’s just asking too much!

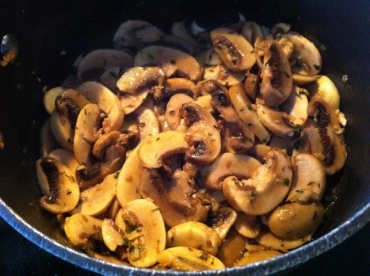
Can I just say it was divine? The whole process (aside from the broccoli). I mean, I got to pound out chicken with a mallet (which I REALLY needed yesterday) and make this AMAZING sauce!

20110518-101226.jpg

I may or may not have stood over the stove slurping every last spoonful straight out of the pan. It was every bit as addicting as The Pioneer Woman’s Whiskey Cream Sauce. I mean, I could have almost eaten it as a stand alone soup! It was just incredible!

And the aroma… well, I guess you had to be there. And you could be if you made it (here’s the recipe)! This will absolutely be a new staple side dish round these parts. The only thing I think I’d do different is use fresh ground whole wheat flower in the gnocchi itself and possibly almond flour in the place of breadcrumbs on the chicken. Other than that… perfection!

Oh, and not overcook the broccoli! 🙂

20110518-101757.jpg

May 11, 2011

A soup by any other color…

I cannot blame him for having an immediate aversion to ingesting this, because to be perfectly honest, I had my own doubts.

I purposefully ladled an unproportionately small helping into my bowl for fear that with the first bite I would spew it across the room and thus ruin any chances of my children ever eating it again.  I mean, just the name alone, “Split Pea Soup,” can’t help but prompt visions of The Exorcist, and I haven’t even seen the movie (although I do know that she does something very similar to what I just described).

No, spewing of any kind just would not do.  You see, one of my missions in motherhood is to not raise children as picky as myself!  It has been a curse all through my life and a cycle I am determined to break.  We serve one meal for everyone to eat and everyone must actually eat it.  This can pose it’s problems, however, when I am the one who doesn’t want to eat something.  I have concocted some pretty tricky maneuvers to get out of eating a good many things without the kids noticing too terribly much, but I have also been forced to step out of my pickyness box in ways I never expected I would.  There is still hope for me yet though.  According to my friend Jodi over at Granola Mom 4 God (my whole foods guru) your taste buds change every 7 years, so who knows what the future holds?  I could love tomatoes someday!

Anyhow, I knew that I had to try the soup… and pray… and smile.  And much to my astonishment, this vile looking mush was sweet and savory and incredibly pleasant.  I was stunned that I had actually been able to get past the appearance, try it and further more like it!  This was a huge step for me!  Next I just had to convince my equally stubborn son to do the same.

At this moment I just wished that it could be some other color!  I mean really, if it were, say… I don’t know… purple, I think we both would have had a much easier time!  Even a nice aqua blue or fussia would do nicely.  Or white!  How about white?!  That would just be splendid, wouldn’t it?! But green?  It’s stinkin’ hard to get past green!

I promised and pleaded with him. I was tempted to break out the 3D glasses just to see if the blue and red lenses might lend me a little aid in this matter!  But alas, finally I admitted, “Honey- I thought this soup looked totally nasty too.  But then I tried it, and it is really good!  Seriously bud, I think you’re going to like it!  Just try it!”

And wouldn’t you know it?  All doubt and repulsion gave way to declarations of “I love it mom!  It really is good!  You told the truth!”

Yes, yes I did.  And now, my fine friends, I pass the recipe along to you- you can find it right here.  Just remember, a soup by any other color would taste just as sweet!

April 25, 2011

Manly Cupcakes

What do you think of when you hear the word “cupcake?” You think of cute things, right? Puffy clouds, rainbows, ponies, pixies dancing on raindrops-girly stuff.

Well “girly” and “cute” are two words that DO NOT fly in the BOLD household unless they are in direct reference to mama or a potential sister for the boys. Pretty much everything in our house is hyper-masculine.

Hunting.

Wrestling.

Sword fighting.

B-boying.

Hu! Ha! Grrrr!

So I knew that since Rhythm had requested cupcakes for his birthday this year I would have to take extra care to make them as anti-girl as possible!

Well nothing says manly like skulls, swords and sea chanties, does it? He had originally wanted a reprise of Lightning McQueen, but the cupcake version. Since I wasn’t quite up for that, we opted for the Pirates instead.

As luck would have it, that good old Pioneer Woman came through for me again. Just as I was contemplating the purchase of a boxed cake mix (gasp! The horror!), she posted this delightful little recipe for vanilla cupcakes with creamcheese frosting! I knew she was good, but this whole mind-reading thing took my love for her to a whole new level!

There is one bone I have to pick with you though, Ms. Drummond (or Ree-Ree as I affectionately refer to her in my daydreams where we are best friends). You said this recipe makes 18 cupcakes.

I believed you.

You lied!

Now look at this mess! The only hope these poor babies stood at this point was a healthy dose of frosting!

And yes, I know the frosting is terribly flat- I actually did that on purpose to stretch it though, since I knew I was covering it with cookies 'n cream sprinkles anyway!

And some distracting flags!

Dun da da da! Problem solved! Phew! That was a close one!

I wish I had a better picture of these dears to offer you, but… my camera sucks.  So, with wonky lighting and a point and shoot Sony, this was the best I could do.

And lastly, I must say, that even though I had to stay up ’til all hours of the night to get these babies done (since, ya know, I had that kind of week last week), and even had to frost them the morning of the party- they were worth it.  I don’t like cupcakes period, but everyone else loved them!  Oogled over them! Adored them!  They were a hit!

And I just may have removed the frosting off a few with a knife and licked it completely clean.

Just maybe.

🙂

Tags:
March 31, 2011

Nothing says Spring like Cranberry Lime Iced Tea!

I am so excited to share this easy and refreshing little recipe with you guys!  It is just so yummy!  AND sugar free (even though, honestly, I’m not usually one to be keeping track of sugar)!  AND simple!  So yeah, it’s got it all!

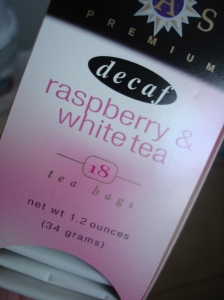
First you’re going to want to select your tea.  I went with a Raspberry White Tea version as it pairs well with the fruitiness of the tea and is also very light in flavor.  Just a little trivia for you- white tea is actually just normal tea but picked at an earlier stage when the leaves are still small and immature. If you would prefer something stronger then you could go with a standard iced tea.

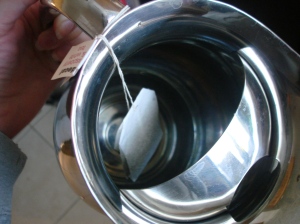
Next, brew up some tea however you like best.  ‘Round these parts it’s still too stinkin’ cold to take the sun-tea route, so I just boiled up some water in the kettle and poured it into a pitcher with two tea bags.  I wrapped the strings from the bags around the handle of the pitcher so they wouldn’t slip in- just a little trick for ya there!  You can thank me later.

I brewed the tea for no more than 5 minutes so it wouldn’t get bitter.

Don’t squeeze your tea bags either- bad karma.

Ok, actually I have no idea about anything involving karma besides what was featured on “My Name is Earl” in the first season, so just take my word for it and don’t squeeze your tea bags.

Oh, and remember that white tea is, well, white.  As in, lighter in color.  If you wait for it to achieve full tea-color strength you might as well just suck down some apple cider vinegar and skip the tea-brewing stage all together!

Once it’s cooled a bit, pop that pitcher in the fridge and wait for that baby to chill.  You could make it a day in advance just to make sure you are already to go, if you are serving it to for an occasion.

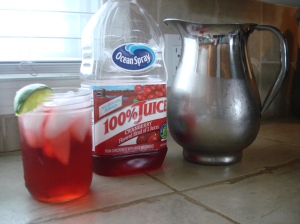
Next comes the fun part- mixing!  If you just want one drink, for your spiffy little self, you are going to want to fill a fun glass with ice, cause well…. it’s iced tea.  Next pour in 3/4 tea and 1/2 Cranberry Juice.  I like Ocean Spray’s 100% Cranberry Juice- it has a nice sweetness and doesn’t have a bitter aftertaste as some cranberry juices do.

Slice yourself a nice little slice of lime.  Make a slit sideways through the middle so you can slip it on your glass- just for looks.  Once you get settled in- let’s say you are sitting down with a romantic novel…

on a chaise lounge…

on your incredibly well decorated, and warm, back patio…

overlooking the ocean…

Yeah- that sounds about right.

Oh, that’s right- the drink!  Squeeze your lime wedge into your refreshing little beverage, give it a swirl and sip the sweet and succulent nectar to your heart’s content.

Now if after you suck down that first glass in 30 seconds flat you decide that you’d be better off making a pitcher-full, OR you are having guests over (sometimes sharing’s fun!) then this might be an easier recipe to follow:

  • 4 1/2 cups Tea
  • 3 cups Cranberry Juice
  • 6 lime wedges

This is enough for 6 glasses

Go on- refresh yourself… and think of me! ;-D